
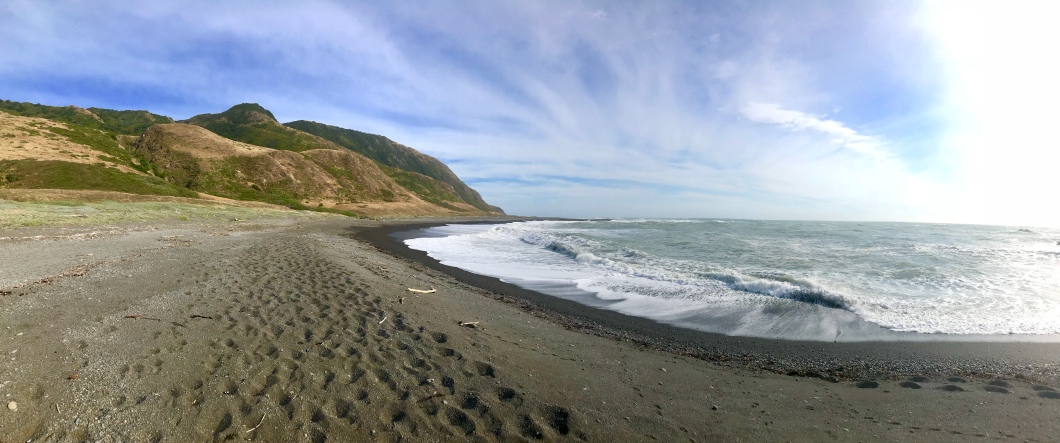
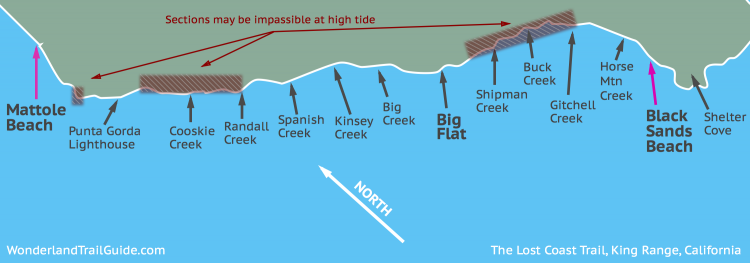
The Lost Coast Trail (Northern section: Mattole Beach to Shelter Cove): 24.6 miles of remote, underdeveloped shoreline. So rugged that highways have not yet conquered it, no mansions built into its cliff-sides. Twice a day, the high tide pounds into the crumbling cliffs here, causing stretches of the trail to disappear below. Do not be fooled by its beauty; the terrain is brutal.
(Side note: There is a southern section to the Lost Coast Trail several miles south from Black Sands Beach. Its route runs inland, unlike the northern section. Regulations for this section are a bit more strict & dogs are not allowed)
Let’s cut to the chase: This terrain SUCKED BALLS.
I think every blog post I’ve seen on this trail has romanticized it. Or maybe they weren’t traveling with a dog, which made it that much harder. (I’ll write more on hiking with dogs at the end). It is said that the average hiker covers about 1.5 miles per hour along the Lost Coast Trail, not including waiting out the sections where you lose the trail if it’s high tide. If you have a dog, even slower.
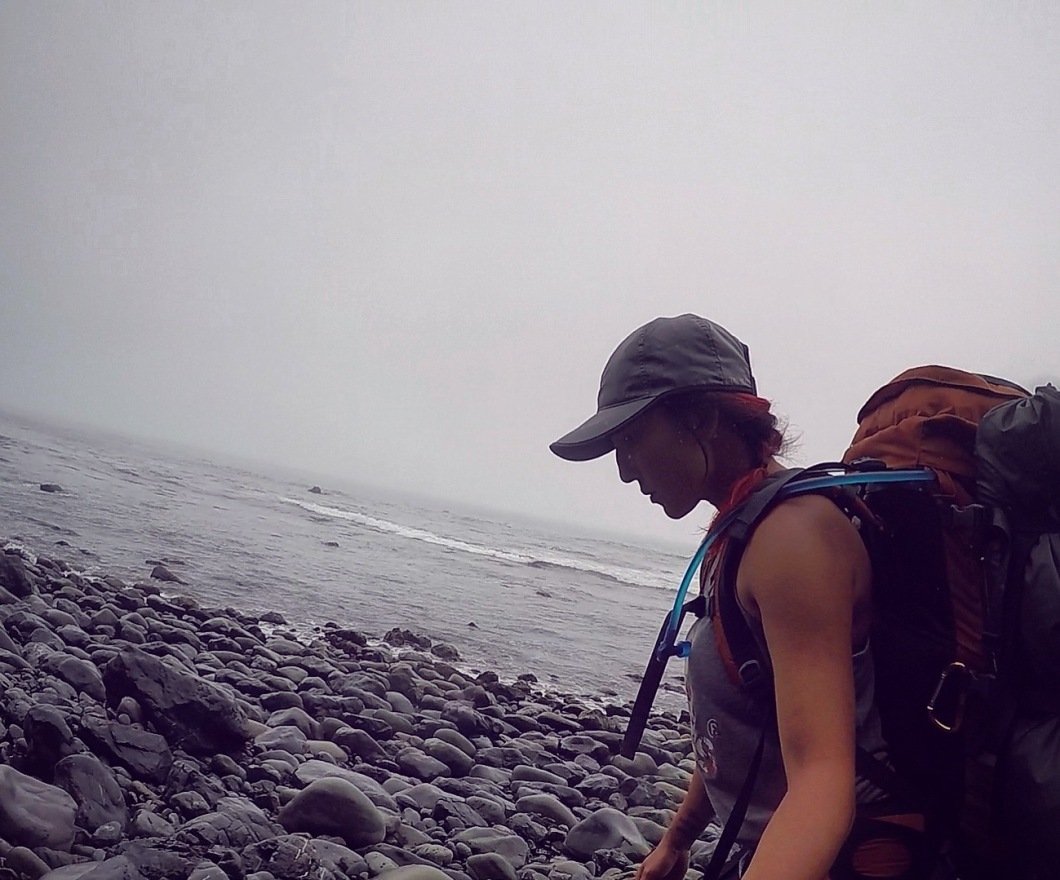
At times, the soft sand engulfs every step, making it more difficult to hike with a pack that is more than a quarter my weight. Rock-hopping thru routes with bowling ball sized boulders for miles—the Russian roulette of ankle sprains. Stretches of pebbles that sink your shoes & fill them. Whipping winds that pelt you with sand & pebbles. Multiple creek crossings. And my least favorite: scrambling up slippery, algae-covered mountainous boulders with deep crevices for your feet to easily slip into. Praise the good Lord Jesus when you finally reach solid, flat ground.
This trail, thus far, might be one of the hardest, varied terrain routes that I’ve ever hiked. When I hiked Mount Whitney, the hardest part of that was just the altitude, the trail itself was fairly easy and I was able to do those 22 miles in 1 day.
Pictured here is one of the varied types of terrain you encounter on this trail. Miles of boulders that roll your feet & ankle every which way as you slowly make your way through while trying to balance with a heavy pack on your back.
When to go: If you take a peek at average rainfall & temperatures, your prime window is between May to late September. Lowest average precipitation for this trail is July– which is when we went. Water sources were plentiful (creeks/streams) & weather was pleasant enough (highs in the upper 60s-70, lows of 54 at night). Even in July, there was still a forecast of a chance of some rain, and while it did get cloudy (and I might have felt a sprinkle of two), we didn’t get rained on during our trek. Of course, there is no avoiding the creeping coastal fog though.
How to get there: The easiest way to do this hike is by leaving your car at the end trail, Black Sands Beach, then hop onto a pre-booked shuttle via one of two companies that provide this service to the trailhead at Mattole Beach for about $200/person. (They only provide the service one-way from Black Sands Beach to Mattole.) We used the latter company, Mendo Insider, because they advertised that they were a dog-friendly shuttle service. Be aware that the shuttle ride is 2hrs long. It may only be 25 miles from one end to the other but the shuttle must head inland & along very curvy, one-lane roads to reach the trailhead. For those with motion sickness, make sure to bring ginger candies.
Otherwise, if you forgo the shuttle service, you will be taking two cars and will need to leave one at each end. This would be an additional two-hour drive back north to pick up the first car at Mattole Beach trailhead after a grueling 24.6 mile hike.
What to wear: There is little to no shelter for this stretch of coast so dress accordingly. Thankfully, I don’t burn easily so I was able to pull off tank tops with some sunscreen. From my trip, I recommend:
-hat
-sunglasses
-pants (that go over your shoes to help keep out sand/pebbles)
-gaiters (for when the whipping wind picks up, those pants will not stop your shoe from filling up with pebbles and sand for miles….insert crying emoji)
-sunscreen
-hiking shoes (high-top, and you know why by now: to keep out the sand & pebbles)
-water shoes of some sort (whether that is a cheap pair from Walmart or a nice pair by Keen, some creek & stream crossings will cause you to fully submerse your feet, sometimes almost to your knees and those rocks at the bottom hurt like a b*tch when barefoot)
Packing: If you can go ultra-light in a backpacking trip, this is definitely the one to do just that. Because of the varied terrain, the lighter the load, the MUCH happier you will be. Trust me on this one. They say the trail takes about 3-4 days. We planned on 3 days & packed food accordingly. (But DO bring some moleskin, your feet will appreciate it).
Also, I don’t normally drink much water on hikes, even in the hot California Valley heat. However, because you are working so damn hard for every step on this hike, I was guzzling water down like a fish & recommend carrying a bit more water than you normally would. Yes, freshwater is plentiful but I was drinking a lot in between streams. I have used and ABSOLUTELY LOVE this Katadyn water pump. It’s easy to use, fast & doesn’t taste funny. I’ve used it backpacking countless times over the years & have yet to get sick. You also might consider packing hiking sticks if you have balance/knee issues. I don’t normally hike with hiking sticks as they encumber me more than anything.
*tip: I wore the same pants the entire trip, brought an extra shirt, a light sweater, a shell (in case of rain), extra undies/sports bras, extra socks and then a shirt to sleep in. Other than that, keep it light! It’s especially easy to keep it light if you are going in summer months, like July, since the weather doesn’t really dip that low. For the trip home, I left a change of clothes, some comfy sandals/slides & spray deodorant in my truck which was waiting for us at the end of the trail. With food/water, gear & tent my pack ended up being 32 lbs! (I vary from 105-110 lbs, mind you, so every ounce counts when I am backpacking).
An *important note*, you must have one of these approved bear cans for your food. I think bear cans are such a pain in the ass to carry since I am pressed for space in my little 55L pack but there are no trees for food-hanging on the Lost Coast. You can also rent a canister from the BLM office on your way there or any of the shuttle companies (if you are booking a shuttle).
I bought the Lil’ Sami 300 cubic inch canister weighing in at 1.12 lbs for my food storage. It was…doable…but a really tight squeeze since I was also packing kibble for my doggo as well. However, my favorite thing about this can is that it’s easy to open & close and doesn’t require extra tools (unlike other bear canisters). Also, the neat thing is that the lid can double as a cooking skillet/pan!
Permits: Backpacking overnight the Lost Coast Trail in the King Range Wilderness does require a permit. Easily done & cheap. Permits for groups limit you to 5 per group. Campsites are pretty obvious, tucked back into areas away from wind & conveniently near water sources.
Tide-planning: As mentioned earlier, twice a day, the Lost Coast trail disappears under the high tide. There are three sections of this trail that are impassable at high tide so just be sure to plan your hike times around the low-tide. Be careful not to get caught in the midst of these sections during high tide as well. Also, just be sure to check trail conditions before your trip!
What we did was make/print a chart of the days we would be on the trail. Under each day, we would list:
1) the time low tide starts + tide height @ that time
2) the time the tide would be lowest + tide height
3) the time high tide starts + tide height
You can use this site for tide planning (which I think is a little more user-friendly) or the NOAA site.

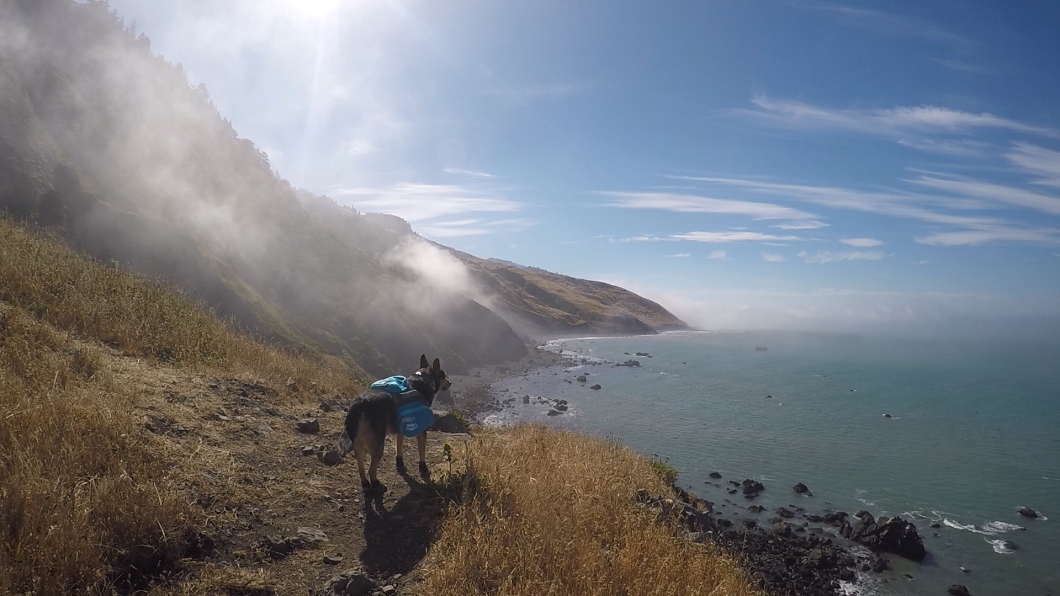
My two-cents on dogs on the Lost Coast: Doggos are “allowed” on the Lost Coast Trail but BLM advises against bringing them. The terrain is rough, even for the hardiest of dogs. 24.6 miles of pebbles, boulders & sand to rub their paws raw. The most difficult section of the trail was trying to rock-scramble the slippery, mountainous algae-covered boulders with your large pack while hoisting a 50lb dog. The rocks were sharp & slippery and the dogs scrambled & panicked trying to get any kind of grip. My shins took a tortuous beating from slipping while trying to stabilize myself, my pack & the dogs.
And if it’s not the the terrain, it’s their shoes. The hiking is excruciatingly slow with dogs. Constantly checking to make sure the shoes stay on during all the varied terrain & that it didn’t get wedged & slip off between a boulder. Constantly stopping to adjust the shoes, the socks & pouring out all the sand & pebbles that slip inside. Then having to completely pick the dogs up at creek/stream crossings to avoid getting their shoes & socks soaked while trying to balance on a log to get across with your pack. IF you are convinced that you STILL want to take your dog, I suggest 2 sets of shoes AND socks. We had never seen our dogs collapse from exhaustion before like we did while on this trail & they’ve done a lot of hiking/backpacking prior to this (However, we did push pretty hard, finishing the hike in 2 days, rather than our planned 3 days). The Lost Coast Trail is definitely not for the faint of heart.
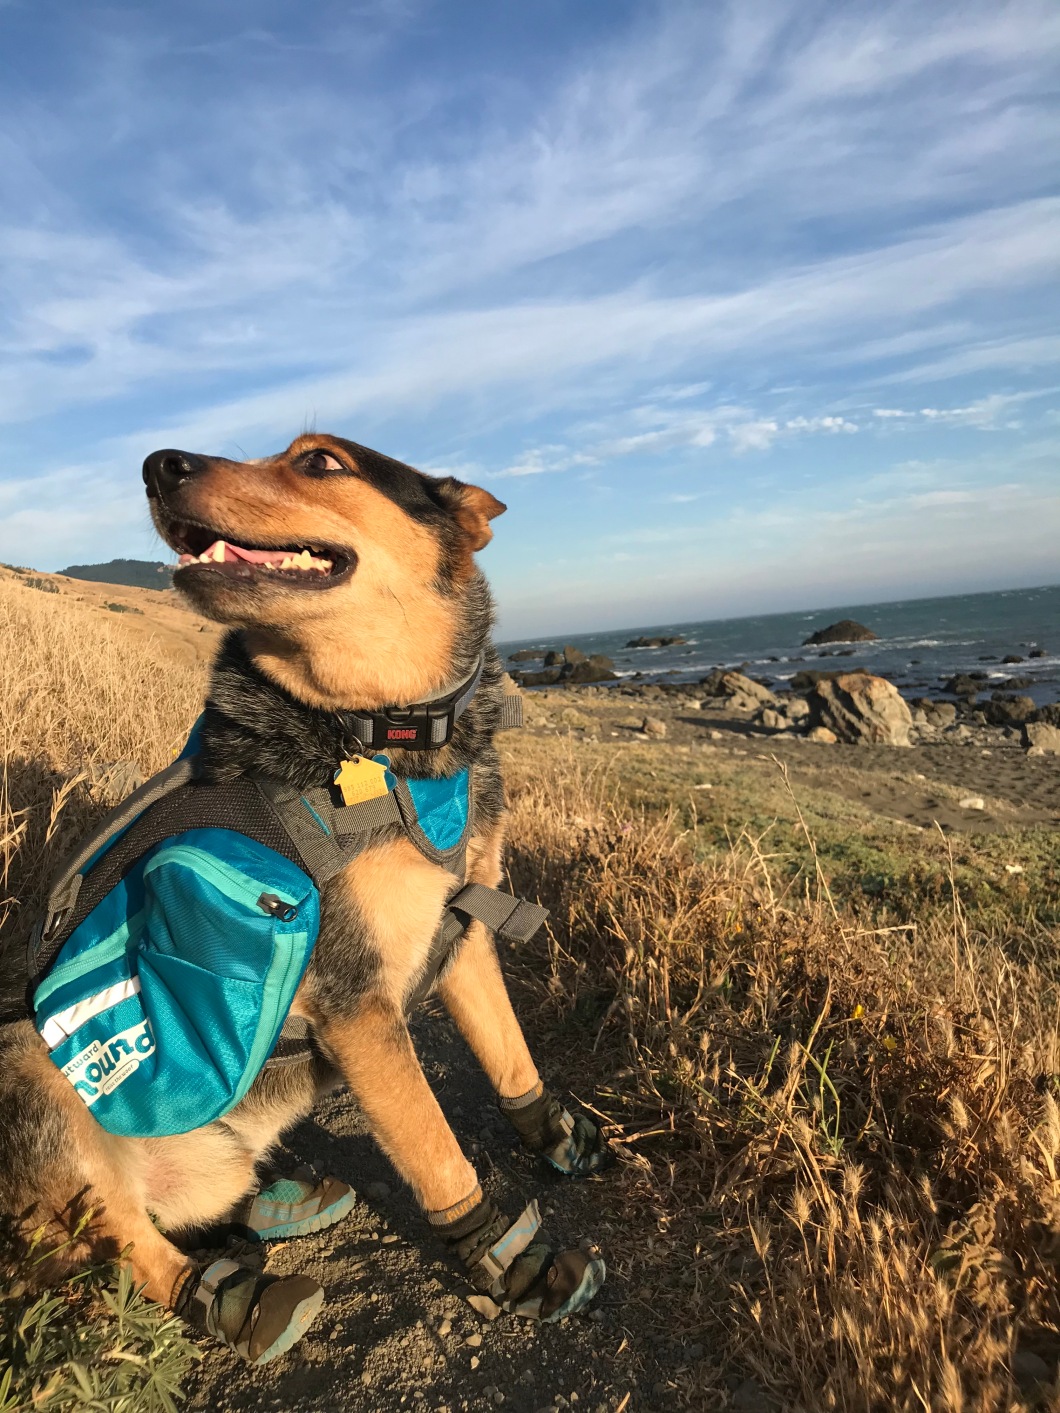
My recommendation for dog-wear: I bought these low-profile Grip-Trex boots from Ruffwear. The shoes filled with sand & pebbles every now and again so it was slow-moving because I would stop and routinely check his shoes. The sand completely engulfs their paws so the low-top made it easy to spill in. Also, the shoes rubbed his paws raw at the crease above his toes & where his dew-claw sits. These strap around the area of his dew claw & now has rubbed it raw from the long trek.
Instead, I recommend the high-top Summit-Trex boots instead because they are more comfortable, strapping above the dew claw, & keep more sand/pebble from spilling in. Put these shoes on them beforehand so that they wear them in, weeks before the trip. I even suggest buying a second pair of shoes, as it is easy to lose them as they walk along the shoreline (It happened to my friend’s dog & I had to backtrack the boulders we had excruciatingly rock-hopped through. As luck would have it, I happened to spy the unruly shoe wedged between a boulder). On that note: also choose annoyingly loud colors when purchasing dog shoes so that they are easier to find if they should come off.
For socks, I am a fan of the Ruffwear socks. They dry fast (when they get wet…and they will on this hike) and are sturdy for wear & tear. I would recommend packing 4 extra socks, in the event that you should lose one…..or say, you were trekking along & didn’t notice your dog’s shoe had fallen off at some point and there was no way you could backtrack to find it so you have to use two socks instead on one off his paws for the rest of the trip….
I was not a fan of the pack that he was carrying as it kept listing to one side. Not sure if it was user error or not but I liked the fact that it didn’t hang as long as the prior pack that I bought him from Ruffwear. However, the Ruffwear brand pack stayed pretty even on both sides of my dog the last few times that we went backpacking with it. My only issue was that it hung a little too long on the sides & my dog is short and stubby, as Queensland heelers usually are.
All in all, unless your dog is tried & true to backpacking and going long, difficult distances, I wouldn’t even attempt to bring the pupper on the Lost Coast Trail. It is definitely more work for you as a dog-parent as well.
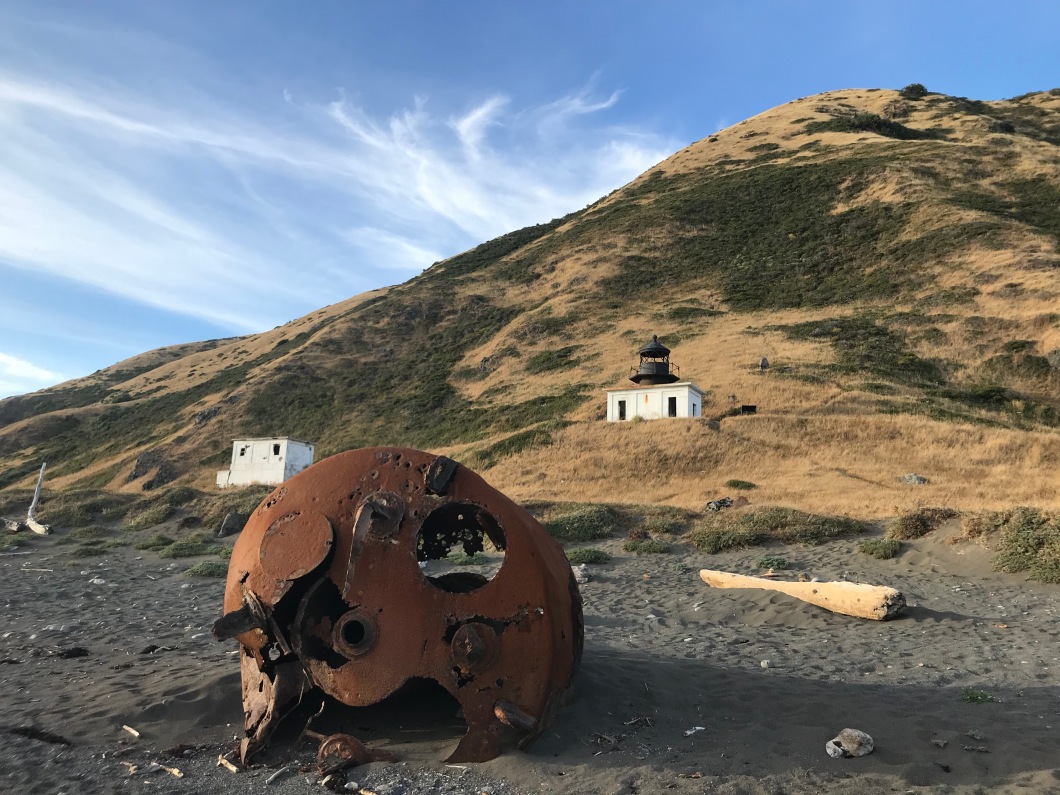
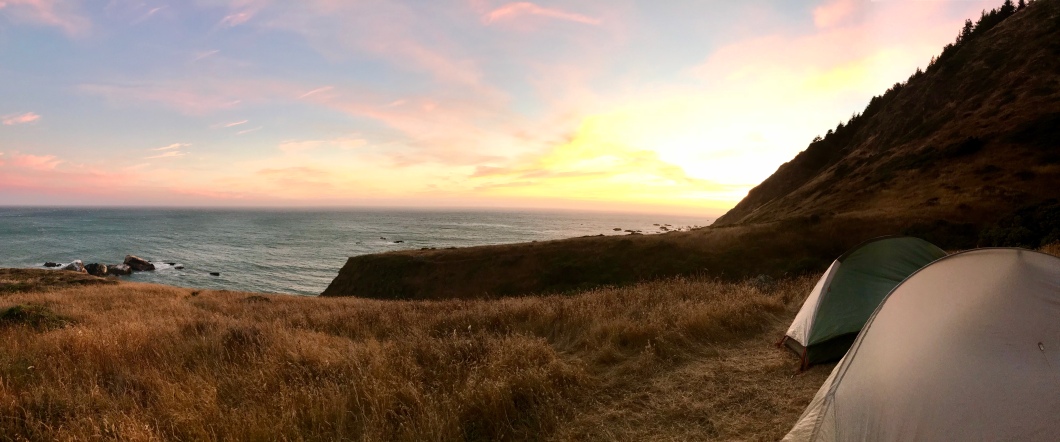 Camp night 1 views
GoPro Quik video of our trek. Didn’t include the hardest sections in this video because…well, frustrating terrain doesn’t exactly make you want to pull out your GoPro and record it 😑

So, beautiful truthfully written. It was truly amazing but harder than to imagine.
LikeLike
I love that you took the time to share all of this! I always see you going on amazing trips and I find myself wanting to do the same but not knowing where to start today what planning actually exists behind the photo. Thank you for being honest and detailed and funny – it was a pleasure to read.
LikeLiked by 1 person
*or (not today)
My phone has a mind of its own!
LikeLike
Thank you! I’m glad my suffering could be of good use for entertainment and information lol Yeah, it’s hard trying to plan backpacking trips and figuring out what you need and the rules and regulations surrounding it. I felt like I NEEDED to write this post because everything I read about this trail prior to going really romanticized the trek. Also, I’m a HUUUGE advocate of females getting out and about to explore and travel!!!
LikeLike
looks like a sweet trail! thanks for sharing!
LikeLiked by 1 person